


- What you’ll learn
- What hardware do you actually need for a visitor management kiosk
- How to choose the right visitor check-in setup for Archie’s visitor management system
- How to estimate your hardware budget, using a simple example bundle
This guide covers what hardware you actually need for your visitor management system, especially if you’ve already chosen Archie Visitors. It also includes the small practical details that usually show up only after you’ve ordered the wrong thing.
What visitor management hardware do you need?
Before you buy anything, it helps to “pick your setup” first. Is check-in happening at the front desk with staff nearby, or do you need a self-serve kiosk in the lobby? Will you print badges, and if yes, will they print at the kiosk or behind reception?
Those decisions make the hardware list much clearer, plus we’ve included a lot of hardware examples and tips throughout this article to help you choose the right setup for your kiosk.
Minimum setup (digital sign-in only)
This is the simplest way to get a visitor kiosk running:
- Tablet: A tablet compatible with your visitor management system. With Archie, you can use your own tablets: Apple iPads as long as they run iPadOS 15.1+ or Android 7+ (tablet devices only, e.g., from Samsung or Lenovo). If you’re not sure which one to buy, check out more examples & tips below.
- Stand or mount: A secure stand or mount from a trusted vendor (like Bosstab or Bouncepad).
- Power: Always-on power with a clean, permanent cable run.
- Network: Stable Wi-Fi (or Ethernet if your setup supports it).
- Optional signage: Helpful if visitors arrive without staff guidance, or if you host events.
- Quick note
Some visitor management systems, like Envoy or The Receptionist, are iPad-only. Archie supports both iPad and Android, and doesn’t sell hardware, which gives you more choice (and often more flexibility on budget and hardware sourcing). You can use your own tablets as long as they meet the minimum OS requirements: iPadOS 15.1+ or Android 7+.
Most common office setup (sign-in + printed badges)
This is what most workplaces end up with because it makes check-ins feel more “official” and easier to manage.
- Everything in the minimum setup.
- Thermal label printer: A compatible printer (for example, Brother QL820NWB or any other QL-series model that Archie supports).
- Label rolls: The correct label format for your software. With Archie, that means DK2251, so your rolls and printer settings need to match.
- Optional badge holders or lanyards: Useful if you want a cleaner look than sticker badges.
If you want the badges to be easier to recognize, you can also enable photo capture and print the visitor’s photo on the badge. In that case, make sure your stand or enclosure doesn’t block the tablet camera, and that the kiosk area has decent lighting.
Front desk check-in (staff nearby)
This is the cleanest setup when you have a receptionist, and you want things to stay simple:
- A compatible tablet.
- A countertop stand for the tablet (e.g., Bosstab Elite Nexus).
- If you print badges, put the printer on the desk (staff side).
- Always-on power and stable Wi-Fi.
- Optional badge holders or lanyards.
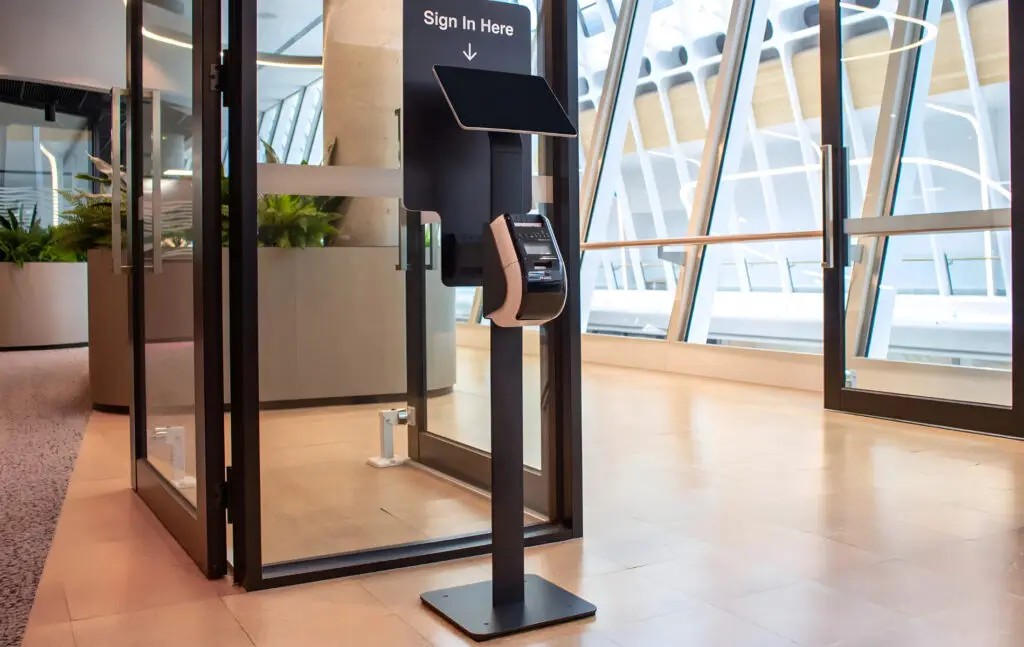
Self-serve check-in in an open lobby
This works best when visitors arrive without help, and you want a clear “walk-up and check-in” station:
- A compatible tablet.
- A floor stand for visibility. If visitors print badges at the kiosk, use a floor stand with a printer mount (e.g., Bosstab Touch Evo Floor Stand or Bouncepad Core Floorstanding with Brother Printer Mount).
- Always-on power and stable Wi-Fi.
- Add signage, because people often hesitate if it’s not obvious what to do.
Tight spaces (narrow entrance or small lobby)
Wall mounts are great when a floor stand would block foot traffic:
- A compatible tablet.
- A wall mount (e.g., Bosstab Elite Wall Mount or Bouncepad Grip-WD140).
- Always-on power and stable Wi-Fi.
- A small sign nearby so visitors don’t miss it.
- If you print badges, it’s usually easiest to keep the printer at reception (or nearby).
Events or busy arrival waves
If you host events, tours, training days, or interviews, your goal is speed and clarity:
- A compatible tablet.
- A floor stand setup (more visible than a countertop setup, e.g., Bosstab Touch Evo Floor Stand with Sign Holder Bracket).
- If badges are printed during check-in, a printer-mounted kiosk setup.
- Always-on power and stable Wi-Fi.
- Clear signage right at the station.
- Consider a second kiosk if you expect lines.
Recommended visitor management hardware
So what hardware do you absolutely need for a visitor management kiosk and badge printing?
Here’s a simple “buy list” for an Archie Visitors setup, with concrete device examples and sample USD pricing (prices change often, so treat these as budgeting anchors, not fixed quotes!):
Tablet kiosk
- iPad: Apple lists the iPad starting at $349. Archie Visitors for iPad requires iPadOS 15.1 or later (which means that any iPad purchased after March 2017 should work)
- Android: A common kiosk pick is the Samsung Galaxy Tab A9+ (11-inch) at $199.99 at Best Buy
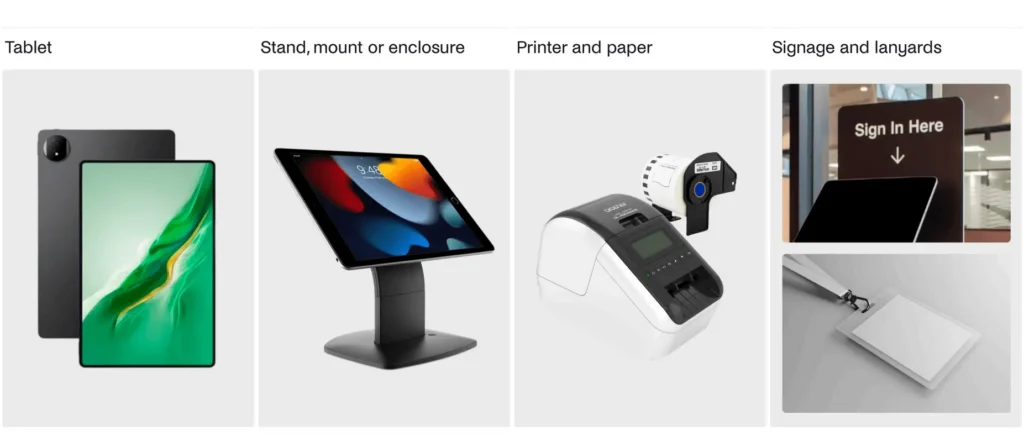
Stand, mount, or enclosure
You’ll usually want something lockable and stable. Bosstab has a dedicated visitor management stand collection, with countertop, floor options, and wall mounts, for example:
- Bosstab Elite Nexus (countertop): $174.95
- Bosstab Touch Evo Floor Stand: $254.95
- Bosstab Elite Wall Mount: $144.95
Visitor management label printer
A popular choice is a Brother QL-series thermal label printer:
- Brother QL-820NWB: $264.35 at Best Buy
- Brother DK-2251 label rolls (a single roll is listed at $35.49 at Staples)
- Optional badge holders (you can find a lot of different options at Amazon or eBay)
🟰 Using the example prices above (before tax and shipping), the hardware comes to about $823.79 for an iPad visitor management system kiosk, and $674.78 for an Android visitor kiosk setup. On top of that, you’ll pay for the visitor management software subscription (in this specific case, Archie Visitors starts at $109 per location per month).
Here’s a one-pager with recommended hardware for an Archie visitor kiosk setup. It lists compatible tablets, floor stands, desk stands, badge printers, and paper labels, with short descriptions and supplier links.
Visitor check-in kiosk hardware explained
The tablet sits at the center of your visitor check-in kiosk (quite literally). Which one should you pick?
Start with one simple rule: your visitor management software decides your device:
- iPad visitor management system kiosks are very common in visitor management. They often have the strongest “official support” from vendors, which usually means fewer surprises during setup. They are also easy to lock into kiosk mode, so visitors cannot exit the visitor kiosk app and start tapping around the device.
- Android visitor kiosks can be a great choice too, especially if your visitor management tool supports Android well. They can be more budget-friendly depending on the model, but the basics still matter just as much. You want a clear screen, stable Wi-Fi, and a secure stand or mount.
Some visitor management systems like Envoy or The Receptionist run only on iPad. Archie supports both iPad and Android, so you have more flexibility when choosing your devices.
Certain visitor management system providers also offer pre-configured hardware bundles (a kiosk kit that arrives ready to set up). In that case, you may need to buy the tablet and kiosk hardware directly from the software provider, instead of sourcing your own.
Here’s a quick comparison of top-rated visitor management apps for iPad and Android tablets:
Software | Best for | iPad kiosk app | Android kiosk app | Hardware bundle | G2 rating |
|---|---|---|---|---|---|
Archie | Mid-sized and larger offices | ✅ | ✅ | No | 4.9/5 |
Greetly | Small to mid-sized teams | ✅ | ✅ | No | 4.8/5 |
The Receptionist (Sign In App) | Small to mid-sized reception desks | ✅ | ❌ | Yes | 4.8/5 |
Envoy Visitors | Enterprise offices with stronger security and compliance needs | ✅ | ❌ | No | 4.7/5 |
VisitorOS | Security-heavy workplaces | ✅ | ❌ | Yes | 4.7/5 |
Eptura Visitor | Large multi-site, regulated organizations | ✅ | ✅ | No | 4.6/5 |
Lobbytrack | Schools, SMBs | ✅ | ✅ | No | 4.6/5 |
So, it’s usually safest to choose the visitor management software first, then buy the kiosk hardware that matches it. Once you narrow down your options, take a minute to double-check device support and operating system versions before you buy anything.
- Quick note
Archie does not sell hardware and works on iPads and Android tablets, so you can use your own devices as long as they meet the minimum OS requirements: iPadOS 15.1+ or Android 7+. That said, Archie Visitors is designed to run on tablets, not phones. Even if the Play Store lets you install them on a mobile phone, the experience won’t work properly on a small screen.
Apart from the operating system, these are the things that tend to matter most when you’re picking a tablet:
- Screen size and quality: A bigger, clearer screen makes check-in easier. Most visitor kiosks feel comfortable around 10 to 11 inches, because visitors can read the prompts and type without squinting.
- Power and battery: Decide if the kiosk will stay plugged in all day (most do). If you plan to run on battery for any part of the day, make sure the tablet can comfortably last your operating hours.
- Expected visitor traffic: If you have steady foot traffic, a faster tablet helps keep check-ins smooth. In very busy lobbies, it can also be worth having two kiosks to avoid lines.
If several tablets meet these basics, it usually comes down to practical stuff like budget, brand preference, and what your team already knows how to manage. Here are a few visitor kiosk-friendly tablet examples:
Tier | Best for | iPad examples | Android tablet examples |
|---|---|---|---|
Budget-friendly | Simple check-ins, lower visitor volume, best value | iPad 9th gen (10.2"); iPad 10th gen (10.9") | Lenovo Tab M11 (11"); Samsung Galaxy Tab A8 (10.5"); Xiaomi Redmi Pad SE (11") |
Mid-range | Busier lobbies, smoother day-to-day performance | iPad Air M2 (11") | Samsung Galaxy Tab S9 FE (10.9"); OnePlus Pad (11.61"); Xiaomi Pad 7 Pro (11.2") |
Premium | High traffic, photo capture, long-term performance | iPad Pro (11") | Samsung Galaxy Tab S9 (11"); Lenovo Tab P12 (12.7") |
Stands, mounts, and enclosures
A tablet on its own can work, but it usually does not feel like a real kiosk until it’s mounted. A good stand makes the check-in point obvious, keeps the screen steady while people tap and type, and makes it much harder for someone to pick up the tablet and walk away with it.
The right choice mostly comes down to three questions: where the kiosk will live, whether you want visitors to print badges themselves, and how much space you have.
Type | Best for | Examples |
|---|---|---|
Countertop stand | Front desk check-in with staff nearby (reception desk or check-in counter) | Bosstab Elite Nexus Tablet Stand; Bouncepad Original Counter; Heckler WindFall Stand |
Floor stand | Self-serve check-in in an open lobby, no desk nearby, or higher visitor volume | Bosstab Touch Evo Floor Stand with Brother Printer Bracket; Bouncepad Core Floorstanding with Brother Printer Mount; Armodilo Floor freestanding kiosk |
Wall mount | Tight spaces, narrow entrances, small lobbies, anywhere a floor stand would get in the way | Bosstab Elite Wall Mount; Bosstab Touch Evo Wall Mount; Bouncepad Grip-WD140 |
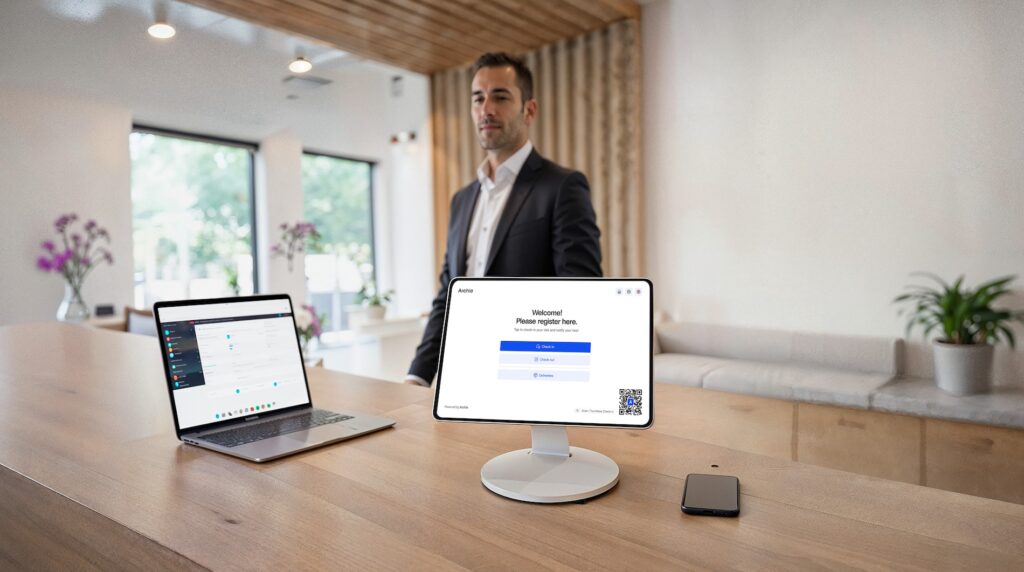
1) If check-in happens at the front desk
If check-in happens at a reception desk (with staff nearby), a countertop stand is usually the simplest option.
This keeps the tablet at a comfortable height on the desk, and if you print badges, you can just place the printer on the receptionist side of the counter. It’s tidy, staff can help if someone gets stuck, and you do not have to “build” a full self-serve station.
A concrete example to reference here is the Elite Nexus line from Bosstab, which is designed for secure kiosk use and includes details like a lockable faceplate and internal cable management.

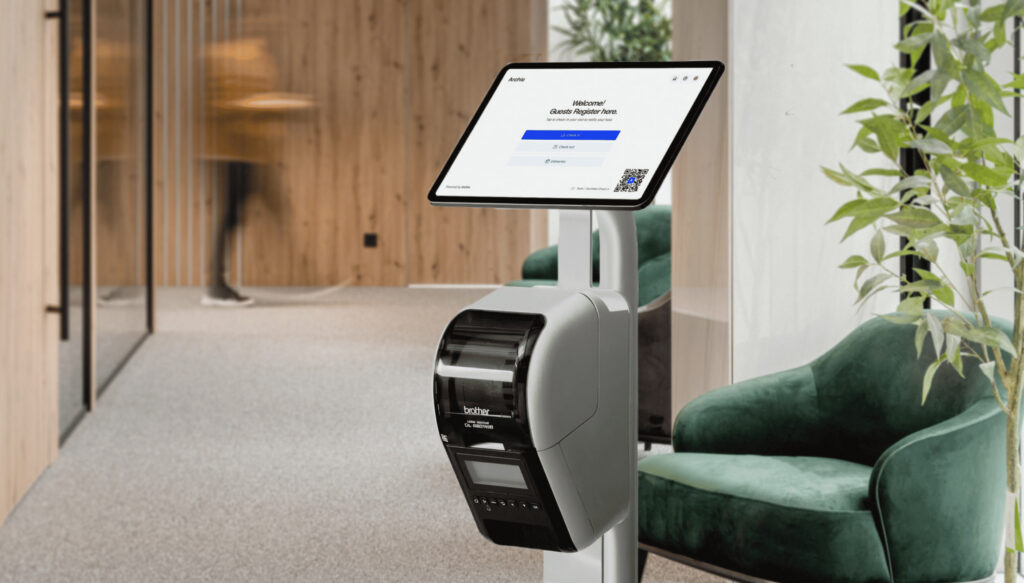
2) If you need a self-serve kiosk in an open lobby
If you need a self-serve kiosk in an open lobby (especially if there’s no desk), a floor stand is usually a better fit. It’s easier to spot from a distance, and it creates a clear “this is where you check in” station.
This is also where badge printing changes the decision. If visitors print badges at the kiosk, it’s worth choosing a floor stand setup that can mount the printer. Otherwise, you often end up with a printer on a random side table, visible cables, and visitors not knowing what to do next.
Bosstab has floor stand configurations designed for this, like the Touch Evo Floor Stand with Brother Printer Bracket (made for mounting a Brother QL-820 series label printer). As an alternative, you can also check stands from The Bouncepad (e.g., Core Floorstanding + Brother Printer Mount).
3) If space is tight
If space is tight, a wall mount can work well, but it tends to need stronger signage nearby. Wall-mounted kiosks are easy to miss, especially in busy entrances, so you usually want a clear visual cue that check-in starts there.
You can check out the Elite Wall Mount or Touch Evo Wall Mount from Bosstab as a recommended option, or the Grip-WD140 model from Bouncepad if you need an alternative.
No matter which setup you choose…
When choosing between a countertop stand, a floor stand, or a wall mount, it helps to think of the hardware as two parts: the enclosure (what holds the tablet) and the stand or mount (what attaches to the desk, floor, or wall).
- Start with durability and stability. A kiosk gets touched all day, so you want something solid, with an enclosure that fits snugly and a base that does not wobble or tip. For floor stands, look for a properly weighted base. For countertop stands, make sure it sits firmly or can be secured if needed.
- Next, think about security. Tablets do get stolen, even in busy lobbies. If the kiosk is unattended, a lockable enclosure is usually worth it. Also consider how keys work. Some teams prefer one key that opens multiple kiosks. Others prefer separate keys per location.
- Then check fit and sizing. You can choose a stand made for a specific tablet model and screen size, or a universal adjustable option. In higher-traffic areas, a stand designed for your exact device usually feels more “kiosk-ready” and sturdy.
- After that, think about how people will use it. Height matters more than most people expect. Countertop stands work best at reception desks. Floor stands are better when visitors are standing and self-serving. Wall mounts can work in tight spaces, but they are easier to miss, so signage nearby often helps.
- Also consider versatility. Some kiosks work best in portrait only. Others need to rotate between portrait and landscape, or swivel slightly if staff help visitors from the side.
- Finally, don’t forget charging and cable management. Your kiosk should stay powered all day. Look for a stand that hides cables neatly, ideally routed internally, so they are not dangling or easy to unplug. And if you capture visitor photos, make sure the enclosure does not block the camera or make it awkward to use.
If you want a simple rule: choose the stand based on your setup first (desk, lobby, or wall), then prioritize security and cable management, and only then worry about looks.
Optional: Signage
You might not need it in a calm office with a receptionist guiding people. But it becomes really important when you host events, expect a rush of visitors at once, or have a lobby where people arrive without knowing where to go. In those cases, signage right next to the kiosk can reduce confusion and speed up check-ins.
If you’re using a floor stand, it’s often easiest to use a stand setup with a built-in sign holder rather than placing a separate sign somewhere else. Bosstab has a specific Touch Evo Floor Stand with Sign Holder Bracket and also sells the Evo Floor Stand Sign Holder Bracket as a standalone accessory.
A practical way to think about signage is this: it should answer the question “what do I do next?” in two seconds. Keep it short, and limit it to one or two steps (for example: “Check in here” and “Print your badge”). If you do ID checks or photo capture, you can add one small line like “Have your ID ready,” but try not to turn it into a wall of text.
Power & network
A kiosk should be treated like a small, always-on workstation. That means:
- Keep it plugged into power at all times
- Hide and secure cables (so visitors cannot unplug them)
- Use stable Wi-Fi (or Ethernet when available)
If you plan to print badges, network stability matters even more, because kiosk + printer failures are often just network hiccups in disguise.
Speaking of:
Visitor management badge printer hardware
For a visitor badge system, most workplaces use thermal label printers. They print fast, are easy to maintain, and do not require ink. A very common model line across visitor management tools is the Brother QL series, especially the QL-820NWB.
But compatibility is not just the printer model. It is also the label roll. Different systems may require:
- Specific label sizes
- Specific label types (even if the printer is correct)
Always confirm both the printer model and the exact label format before you buy!
- Quick note
Archie Visitors supports different Brother models, including QL-710W, QL-720NW, QL-810W, QL-820NWB, QL-1110NWB, and QL-1115NWB, and the DK2251 format for printing, which means your label choice and printer settings must match that format.
If you want badges to feel more secure (and easier to recognize), you can also enable photo capture at check-in and print the visitor’s photo on the badge. In that case, make sure your kiosk stand or enclosure does not block the tablet camera, and that the kiosk area has decent lighting.

Some printers also support time-expiring badges made with special label paper. After a set number of hours, the badge will fade or show a clear “VOID” mark. That makes it obvious the badge is no longer valid and helps prevent someone from reusing it later. For example, Velocity Labels sells “Expiring by Threshold” badge rolls that are Brother QL series compatible.
Connectivity: Wi-Fi vs Bluetooth
Most visitor apps can connect to badge printers over Wi-Fi or Bluetooth.
For a front desk setup, Wi-Fi is usually the easiest and most reliable option, especially when the printer stays in one place. It tends to stay connected in the background, and you do not have to deal with re-pairing.
Bluetooth can still work fine, but it is more common to run into “printer not found” moments, pairing issues, or random disconnects.
- Quick note
Archie Visitors supports both Wi-Fi and Bluetooth, but we recommend using Wi-Fi when available because it is more reliable. If you are using a common visitor management badge printer like the Brother QL-820NWB, you have flexibility: it supports Bluetooth, Wi-Fi (802.11b/g/n), Ethernet (wired LAN), and USB.
Optional: Badge holders or lanyards
If you are printing sticker-style visitor badges, you can usually stop there. That said, badge holders or lanyards can be helpful when:
- Visitors wear nice clothes, and you want to avoid stickers on fabric
- People move around a lot, and badges tend to peel off
- You want badges to be easy to spot from a distance
- You run events, tours, or shared-office spaces where visitors stay longer
Some offices also invest in plastic card printing for visitors, but it usually costs more, takes more setup, and you will need extra consumables (like card stock and ribbons). It can be worth the investment if visitors stay much longer than just a day, or you want a sturdier badge for access control workflows (depending on your setup).
Procurement checklist: questions to ask before you buy anything
1) Confirm visitor kiosk + OS compatibility
- Does the visitor management app support iPad, Android, or both?
- What are the minimum OS versions supported right now?
- If you’re using Archie Visitors, confirm your tablets meet iPadOS 15.1+ (any iPad purchased after March 2017 should work) or Android 7+ (only tablet devices, not smartphones!).
2) Pick the right stand type
- Will check-in happen at reception (countertop stand), in an open lobby (floor stand), or in a tight space (wall mount)?
- If the kiosk is unattended, do you need a lockable enclosure/faceplate?
- If you capture visitor photos or scan IDs with the camera, will the enclosure block the camera or make the angle awkward?
- If visitors will print badges at the kiosk, do you have a stand setup that can mount the printer (or a dedicated surface right next to the kiosk with clean cable routing)?
3) Confirm badge printer support (model + connection)
- Which printer models are officially supported by your visitor management system? (Archie supports various Brother QL-series models)
- How will the printer connect: Wi-Fi, Ethernet, Bluetooth, or USB?
- What does the vendor recommend for reliability (often Wi-Fi for front desks)?
- What label roll format is required by your software? (If you’re using Archie, confirm the format is DK2251, and make sure your label roll and printer settings match it before buying labels in bulk)
- Add spare rolls to your order so you don’t run out mid-week.
4) Network + power sanity check
- Will the kiosk stay plugged in all day?
- Do you have a plan to hide/secure cables so visitors cannot unplug them?
- Is the kiosk on stable Wi-Fi, or can you use Ethernet where available?
- If you print badges, confirm the kiosk and printer are on a network setup that actually works together (avoid “kiosk on guest Wi-Fi, printer elsewhere” situations).
5) Signage (optional, but often worth it)
- Do you need signage because of events, high volume, or a self-serve lobby?
- If you’re using a floor stand, would a setup with a sign holder make things clearer?
6) Scale + backup planning
- Based on visitor volume, do you need one kiosk or two to avoid lines?
- Do you want a spare label roll (and possibly a spare power cable) on hand?
- If the tablet fails, do you know which exact model you’ll reorder?
If you take one thing from this guide, let it be this: pick your visitor management software first, then buy hardware that matches what it supports. That one step prevents the most expensive mistakes.