This is a guide on how to integrate and use Ezeep on Archie for any of your printing needs. Follow the steps below and you should be good to go.
Step 1: Integrate Ezeep on Archie
As with any integration, the first thing you need to do is make sure you have integrated Ezeep on the platform. To do so, simply go to settings—> Integrations—> Ezeep.
Once you’re there, simply click “connect” and integrate your Ezeep account. After this, you’re ready to start your printing configuration. What this means is that here, you will set up the prices that people will pay for their printing.
Step 2: Configure Printing Settings
For the configuration, what you need to do first is to access the printing page by going into Settings —> System —> Printing.
Once you’re in printing, click on the “add configuration” button.
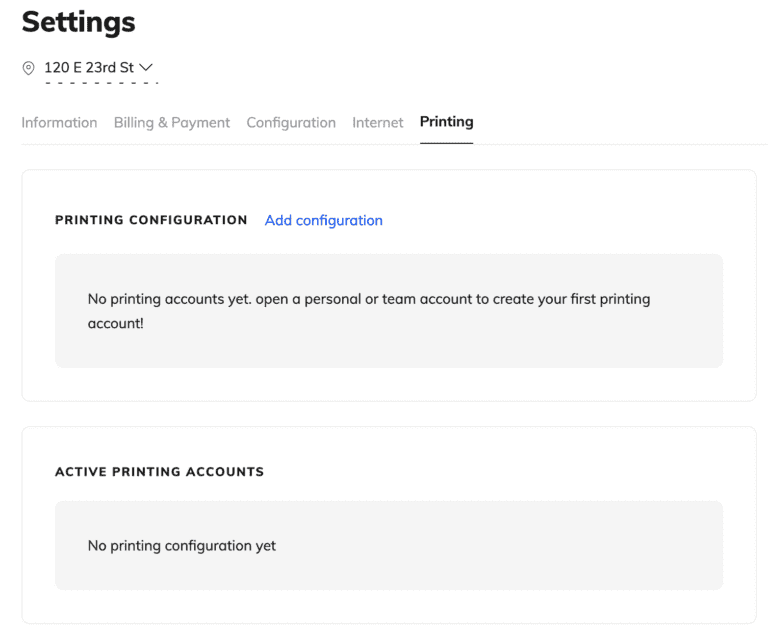
Then, you’ll be taken to a pop up where you will need to create a customization. To do so, simply click “add customization”.
You will then be able to select who it is customizable for, either a member or a user.
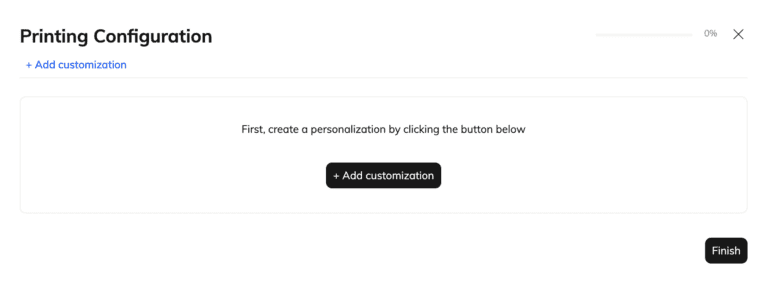
After this, you will be able to set your prices for printing, as well as add any accounting codes and taxes if applicable.
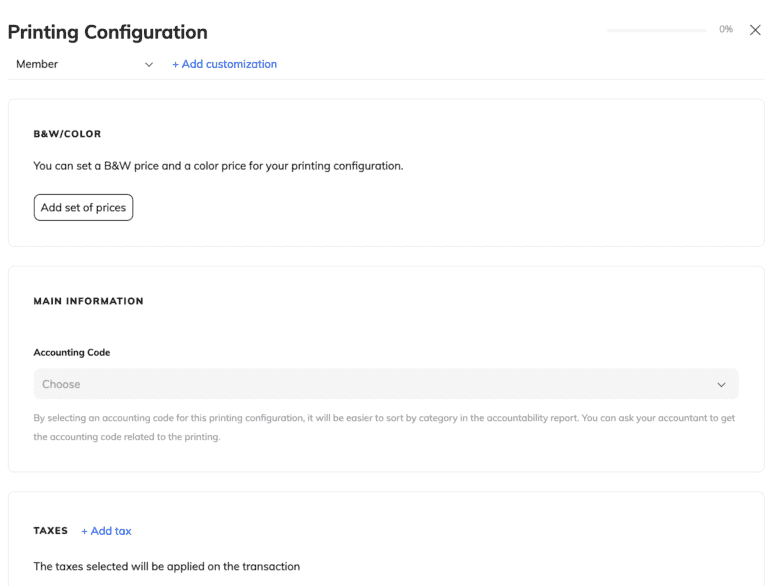
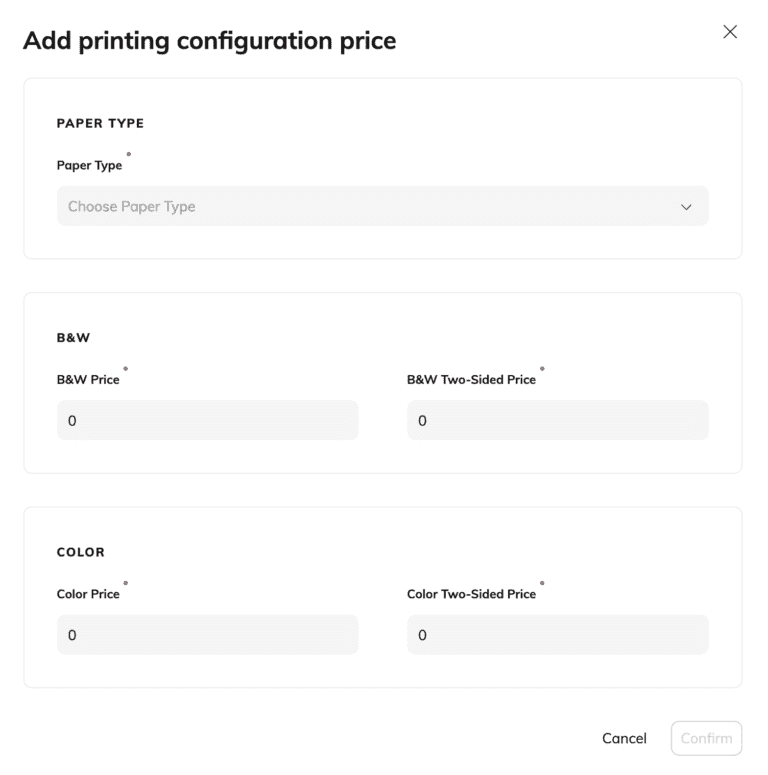
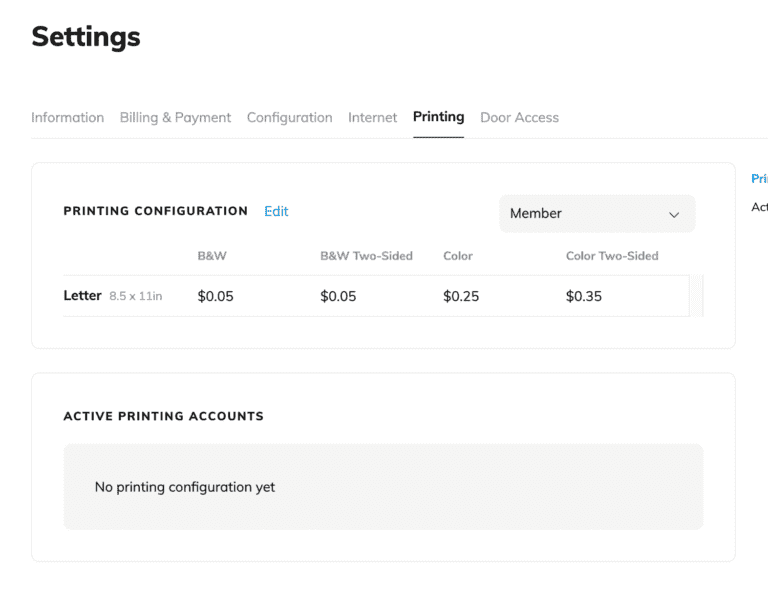
To add prices, simply click the “add set of prices” button and you will be taken to this page. Here you can select the paper type, as well as the prices for black and white and coloured pages.
Once you have done so click “confirm” and then “finish”.
Your printing configuration should then look something like this:
Step 3: Giving accounts credits
Once that’s done you can then you can go into accounts and open on an individual or team account, then go into “printing” directly from the specific account.
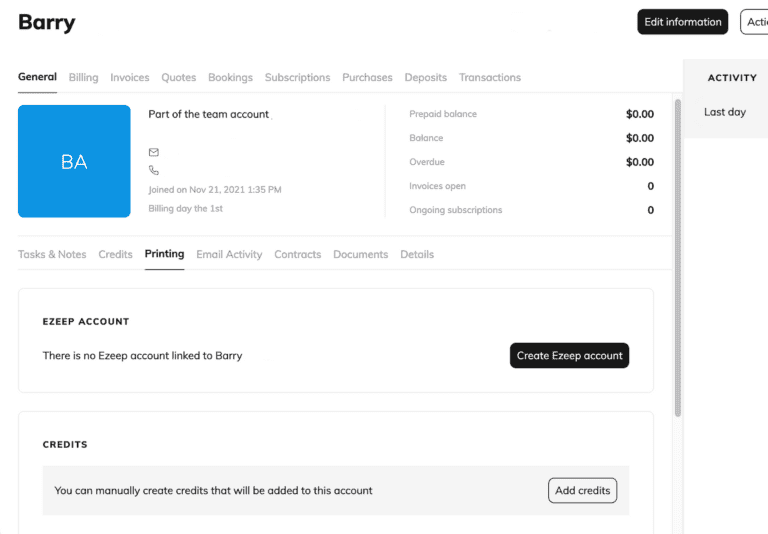
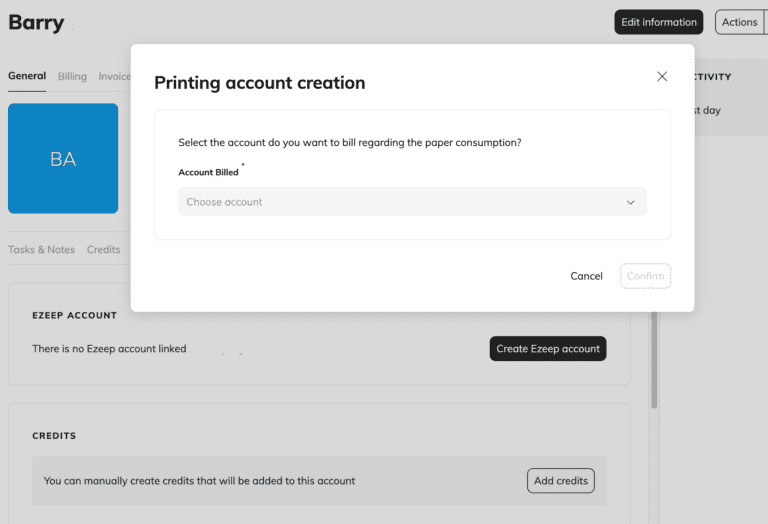
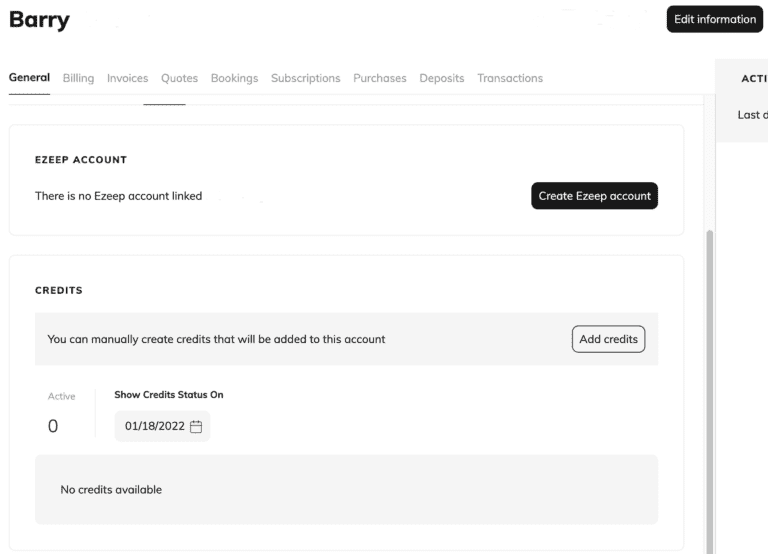
Click “create Ezeep account” and you should be able to create one directly from there and select the billing as well.
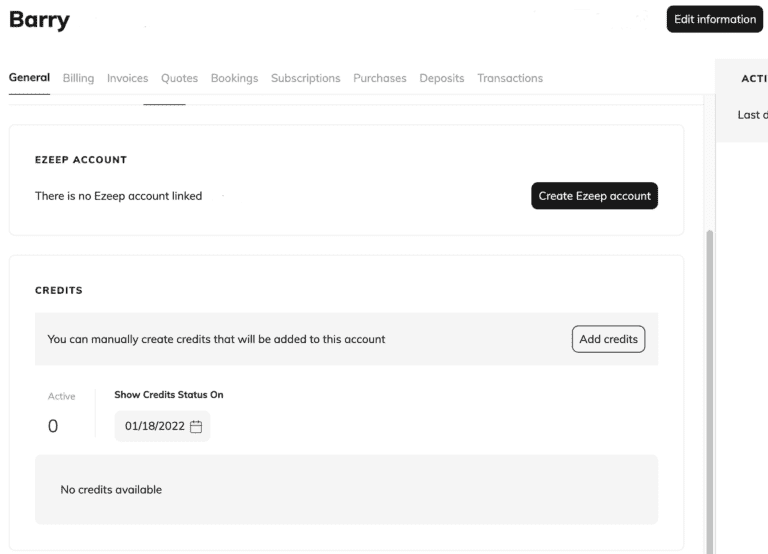
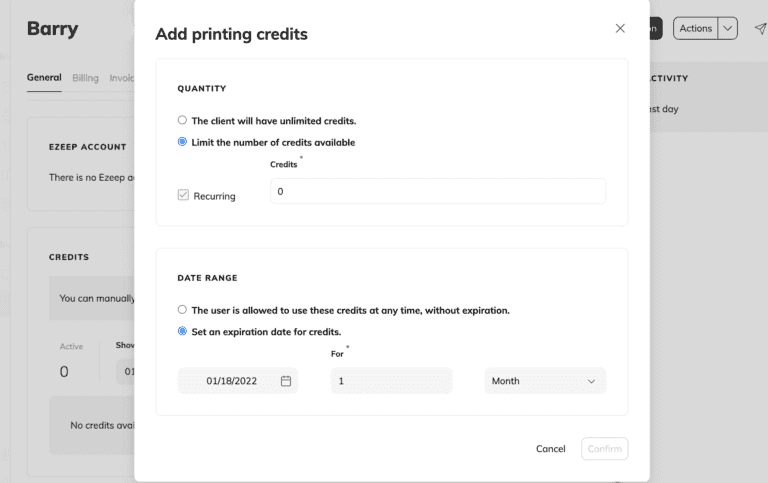
Once that’s done, you can scroll down and add credits to the account by clicking “add credits”.
This will open up a pop up that will allow you to add printing credits to the account. You can either select if you want to give them unlimited credits or limit the number of credits available to them and select a specific amount.
Step 4: Creating Ezeep Accounts on Archie
To make sure that everything is billed correctly, you will have to take the final step of creating Ezeep accounts in Archie.
To do so, go back to the specific account, and under the printing tab click “Create Ezeep Account”.
Once you complete the first step and connect Ezeep to Archie, Archie will create a group in Ezeep named “Archie”.
When you create an Ezeep account on Archie, Archie will automatically create the user on Ezeep’s side in the “Archie” group.
When a user is added, Ezeep will send a welcome email to the them. The user will be asked to create his account and will have links to download drivers for their computer.
After this, whenever they will print through the cloud (using Ezeep plug-ins), Ezeep will send Archie a notification with the information related to the printing job (color/B&W, number of pages, paper format etc).
At the end of the month, Archie will retrieve all the printing jobs and will generate a new line in the invoice with the amount to pay. The prices are calculated with the printing configuration ).
And that’s it! You now have all the necessary information to integrate Ezeep on Archie!










![38 Top Coworking Conferences and Events of 2026 [Confirmed] Top coworking conferences - cover image.](https://archieapp.co/blog/wp-content/uploads/2023/10/coworking-400x400.jpeg)
